Coffee Filter Bats

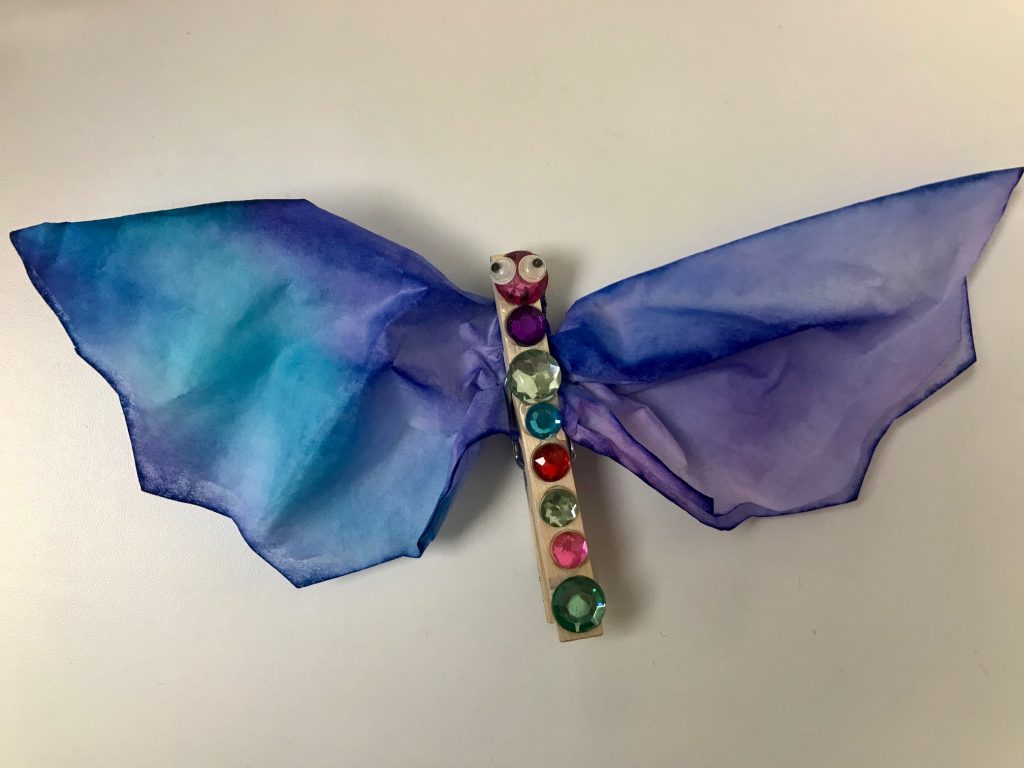
This week we are making coffee filter bats!  All you will need is a scissors, liquid glue, washable markers, a coffee filter, clothespin, jewels, and eyes. ( You could also draw the eyes on with a marker)

First you will color your filter and either spray or dunk it in water to let the colors mix. Let the filter dry. Once it is dry, fold the filter in half, and then half again. Cut the edges curved to make bat wings. Open it up so it is just folded in half again. Pinch it with your clothespin. Then glue jewels onto the top of the clothespin. Glue the eyes on the top jewel to make the face!

Enjoy your colorful bat!

Ghost Straw Art

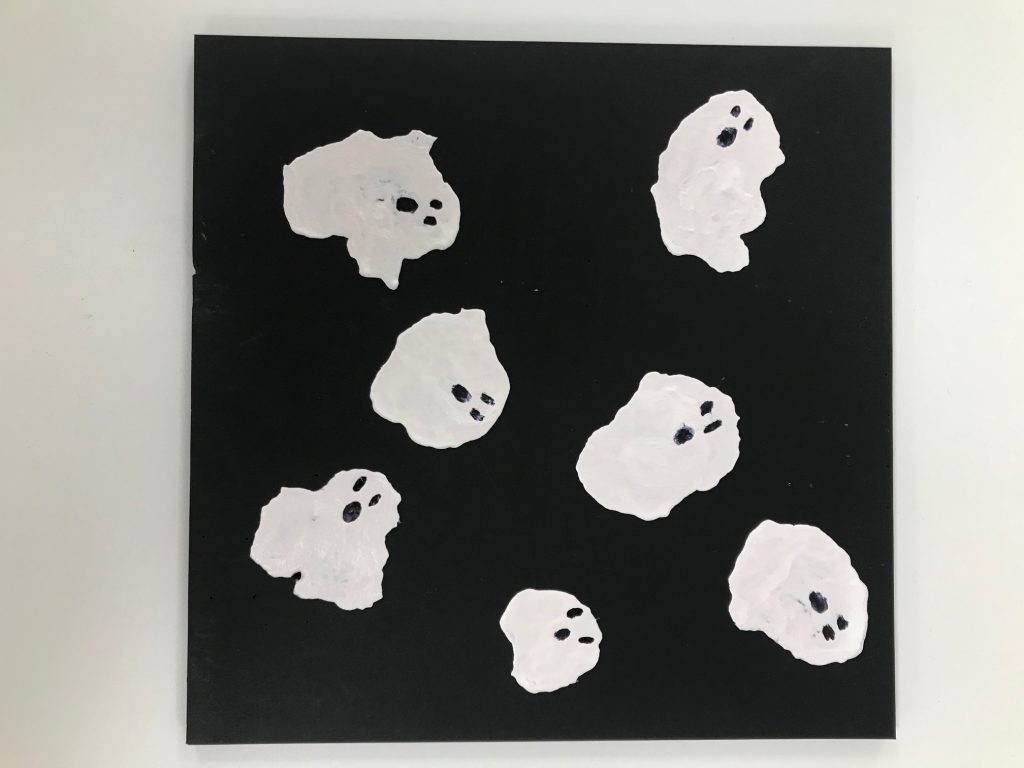
All you will need is a black marker, a black piece of heavy paper (cardstock, construction paper, or tag board), white paint, and a straw!

First you will take the white paint and dab it onto your black board. Take the straw and angle it towards one side of the paint dot. Blow through the straw, making the paint move downward. You can control the direction of the paint by moving the straw. Keep the straw straight to create a long ghost. Move the straw slightly back and forth to create a wider, flared ghost. However, keep the straw angled on one side of the paint dot.

Then let your paint dry. Once dry, decide which direction of each blob you want to be the head. Once decided, take your black marker and draw faces on your ghosts!

Enjoy!

Baked Cotton Ball Sensory Play

Cozy up during this cold week and enjoy a sensory craft.

You will need a few items:

-Cotton balls

-Flour and water in a 1 to 1 ratio (ex: 1 cup flour, 1 cup water) You may use gluten free flour if you wish!

-Cinnamon, pumpkin pie, or any other fall spice mix if you wish to make this a scented craft

-Paint or food coloring: You may use water colors, acrylic, tempera, or food coloring

-A lined cookie sheet

-Something to break the cotton balls when done

-An oven

Mix up your flour and water, and add a small amount of the spices if using those. Divide and add different colors of paint or food coloring if you choose to color them. A little goes a long way! You do not need much. Dip each cotton ball in the mixture and put on the lined cookie sheet. You can place them individually, or together if you want to make something like a pumpkin.

Bake in the oven at 325 for about 30 minutes. Check on them occasionally to see if they are turning brown.

Remove from oven and be sure to let cool, they will be hot! Enjoy smashing them!

Changing Leaves Tree

Welcome back to our weekly Tuesday craft! Follow along here on the blog with your own supplies, or grab a kit from the take-n-make bin! We took a short break for a few weeks but are now back at it with our weekly crafts! This week’s project is inspired by the beginning of autumn as the leaves start changing.

Our take-n-make kit included green and yellow paint to represent the changing of the leaves and a printout of a tree silhouette on cardstock paper. So if you are following along on your own, I’ve attached a tree printout here: Feel free to find a different one if you’d like and then gather up any fall colored paints you want to use.

You will then drip your paint onto the tree, keeping it up in the branches rather than lower on the trunk. When you are happy with the placement, fold the tree in half. Press to spread the paint up to create the leaves, once again, trying not to go down too far onto the trunk. When you open the paper you will have a beautiful tree! Let it dry.

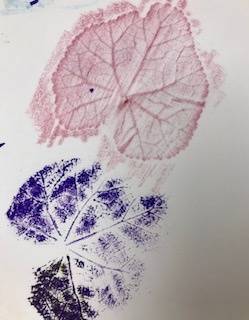
Leaf Rubbing Invitation to Play

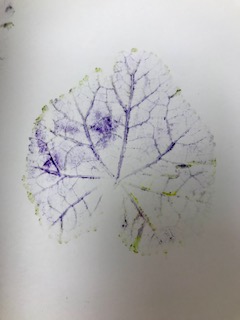
How many different ways can you experiment with leaf rubbings?!

You will need:

-Paper

-Leaves of different shapes, colors, sizes, and textures.

-Various supplies like colored pencils, markers, crayons, or even paints. Experiment with creating different rubbings with the supplies you have.

You can try coloring the leaf itself and stamping it onto the paper, or you can put the leaf under the paper and color on top.

Notice what works and what doesn’t, and have fun!

Wobblers!

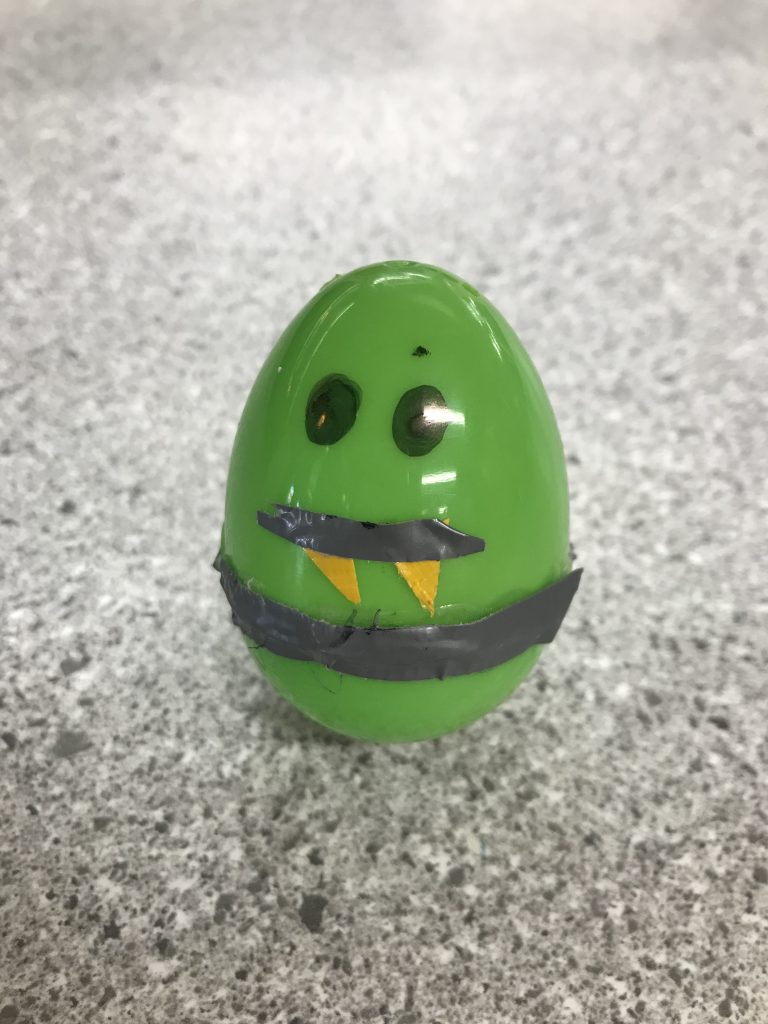
This craft includes a plastic egg hot glued shut, various pieces of tape, and googly eyes. If you did not pick up a craft kit and are doing it on your own you will need a plastic egg and something heavy in the bottom. To make it easier, we just smooshed non drying modeling clay in the bottom and hot glued the egg shut. You will also need a permanent marker, duct tape, liquid glue, and any other decorative items.

Decorate your egg however you wish. Some ideas are a ninja, a monster, or an animal! To use the tape, just cut it to size and peel the wax paper off the back.

Have fun!!

Sunflowers

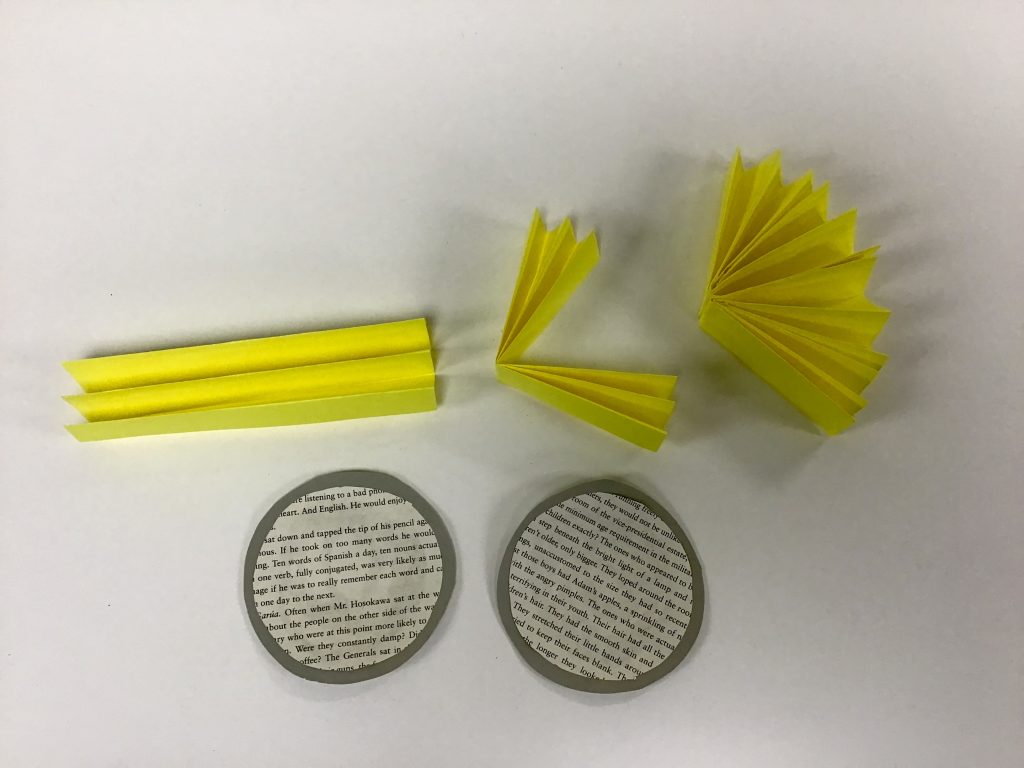
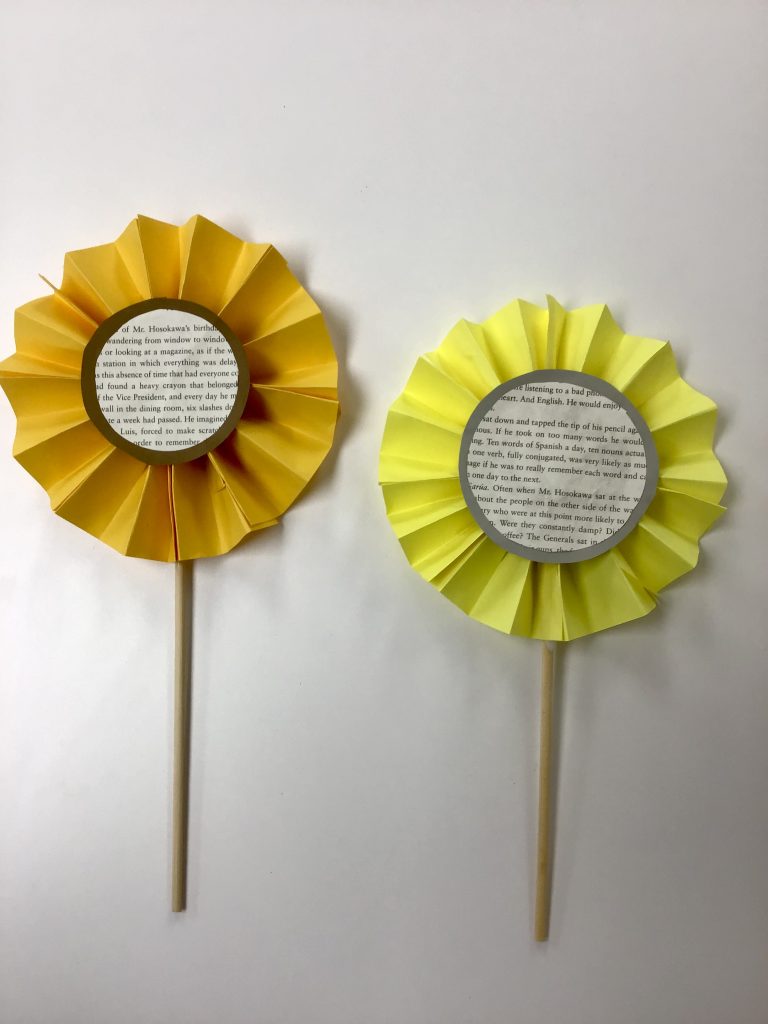
For this craft we are using 5 squares of paper… 4 are yellow or orange, and 1 is brown or grey. We are also using a page from an old book and a chopstick. You will also need a pencil, something round to trace a circle, and liquid glue. Begin by accordion folding each yellow/orange square of paper. Keep it folded and then fold in half. Just like the picture shows the stages:

Glue them together to create the flower. (So glue them in half, then to each other) You may have to add a bit more glue in the center, you will notice where it is floppy but adding our flower center will also help with that. Then take your book page and fold it in half. Find a circle object and trace the circle so it fits within that. Cut it out and you now have two circles for the center of your flower. Glue the circles onto the brown or grey paper and cut around them to leave a colored border. This will be the center of your flower. Glue it onto the center and you have a sunflower! Take your chopstick and stick it up far enough into one of the folds and add glue before pressing shut, hold for a few seconds and let it dry. This is the stem.

Paint Chip Color Find

This week we will be focusing on color with a paint chip scavenger hunt. You will need paint chips of different colors. We used 10. Then punch holes in the paint chips at the top corner, so you can thread a string through and tie it in a knot. Then all your paint chips will be together and ready for the hunt. You could also just put a binder ring through the holes if you have one.

Next, either cut a shape out of the center of each paint chip, or use a bigger punch. Then you will take your paint chips and try to find objects that match each color. I found a book with writing that has the same shade as below. The bigger shape you cut out of the center allows you to match colors easier by just holding it over the object and comparing to the paint chip.

Have fun!!

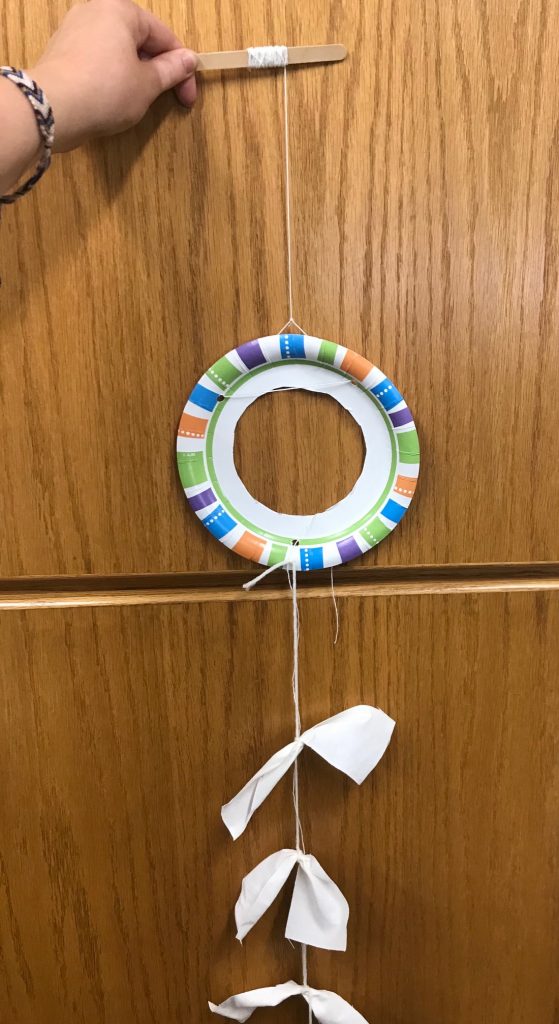
Paper Plate Kites

You will need a paper plate with three holes punched, cloth scraps, yarn, and a popsicle stick with a long string tied to it ( can use yarn or something thinner). First, take something round and trace a circle with it in the center of the plate. Cut the circle out. Punch the holes in a triangle formation, two across from each other on one side of plate, and one on bottom in the middle distance of those two on the top. See picture below. Then you may decorate the plate.

Next, take a thin string that is tied to a popsicle stick and thread it through the top two punched holes and tie off. It should also make a triangle shape, refer to the picture below to see how it is tied. Then, cut your cloth scraps into small strips. If you would like to color them, you can do that! You will tie them in the center with your yarn so you have a string of yarn with the scraps tied on, like the picture below!

Then you will tie one end of the yarn to the last punched hole in your plate. This is the kite tail. Take your kite outside and fly it by holding the popsicle stick and unwinding some of the string as you move with your kite!

Paper Bag Luminaries

This take-n-make craft includes a paper bag and an LED tea light or coaster light. You will need scissors anything else you decide you would like to use to decorate your bag.

All you need to do is decorate your bag. Cut designs and holes into it let the light in. Cut edging across the top of the bag too, which will get rid of the folded/ stapled part.

If you have an LED tea light, just pull the tab and flip the switch on. Then place it inside your bag. If you have coaster light, pull the tab and the 3M sticker, then stick to the outside bottom of your bag. Press the button to light, and keep pressing for different light settings. Enjoy your luminary in the dark!