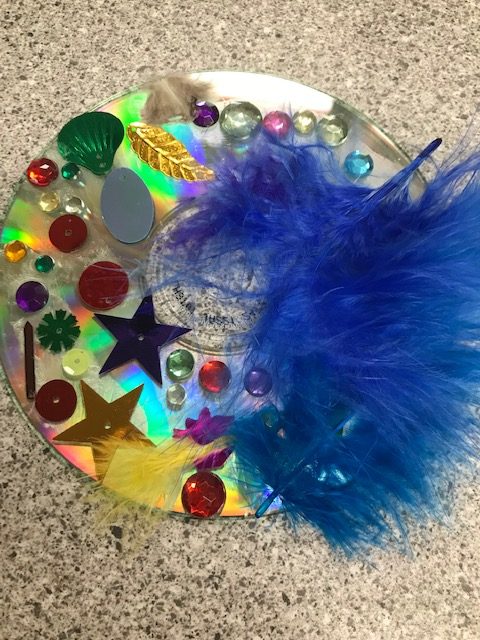
All you need for this craft are some blank CDs, fishing line or string, a glue stick, and different materials to decorate your suncatchers. Just glue on your decorations and hang in a window. We used sequins, jewels, and feathers for ours!
Bowman Regional Public Library
Bringing people, information & ideas together to enrich lives and build community.
All you need for this craft are some blank CDs, fishing line or string, a glue stick, and different materials to decorate your suncatchers. Just glue on your decorations and hang in a window. We used sequins, jewels, and feathers for ours!
We decided to add a bonus take-n-make craft this week!!
Independence Day Fun
Here are some fun ways to celebrate the 4th of July without fireworks.
We have included several activities/items in each kit, including a “sparkler” made out of ribbons hot glued to a stick and glow sticks for plenty of fun! If you are following along with your own supplies, we listed them with each craft/activity.
Pom-Pom shooter
(You will need scissors, tape, a balloon, a cup or toilet paper roll, and pom-poms, plus anything you would like to decorate the cup/paper roll with. )
· If you are using a paper or plastic cup, have an adult cut the bottom out of the paper cup with a craft knife or scissors. If you are using a toilet paper roll, you are all set with step one.
· Step two is optional depending on how crafty your kiddos want to get with this project. Decorate your cup or tube with paper, stickers, tape, etc.
· Trim the very top off a standard 12” balloon with scissors. Knot the end of the balloon. Gather the cut balloon and stretch it over one end of the cup, centering the knot over the opening. Do the same if you are using a cup! Use a rubber band or some tape to secure the balloon to the cup or toilet paper roll.
· Time for the fun! Load the pom-pom shooter with pom-poms, pull back on the knotted end and then let go to launch the pom-poms! You can even make your own targets.
Reuse your paper bag to create a kite!
(You will need a brown paper bag, string, streamers, glue, something to poke a small hole with, a popsicle stick, and anything else to decorate your kite)
Take your bag and poke a small hole in the bottom in the middle with a pencil or something similar. Take the red and white string and tie one end to the middle of your Popsicle stick. Thread the other end of the string through the hole you made in your bag, and gently pull it all the way through. The Popsicle stick will stop it from coming all the way out. This is your kite handle. Decorate your bag as you wish, we included streamers that can be taped or glued to the open end of the bag. Then you are ready to fly your kite!
Pipe Cleaner Bubbles
(You will need a pipe cleaner, beads, and the ingredients listed below to make your own bubble solution)
Lastly, take the pipe cleaner and create a loop, twisting the two ends into a stem. Add the beads to the stem for decoration. Then create a bubble solution by mixing:
4 Tbsp water
1 Tbsp concentrated dish soap
2 Tbsp sugar
Have a fun and safe 4th of July!

Each kit contains a glass bottle with blue food coloring, a cup of hair gel, a cup of glitter and sequins, and either a goldfish snack or a scratch art page.
If you are following along with your own materials you will need a glass bottle, water, hair gel, blue food coloring, glitter and sequins. The amount of hair gel depends on the consistency you want for your bottle. We did a little less than 1/4 cup.
You will fill your glass bottle halfway up with water. There is blue food coloring already inside to create the ocean water. Then add in the hair gel and either stir or put the lid on and shake. Then slowly add in your glitter and sequins and more water to fill up. Screw on the lid tightly and shake. Then enjoy your ocean bottle and your snack or scratch art!
This craft is available as the second take-n-make kit for adults participating in the Adult Summer Reading Challenge. ( Ages 21- on up). Registration is required and that opens on Wednesday, June 23rd. Once they are gone, they are gone! Register here: https://docs.google.com/forms/d/e/1FAIpQLSdI1gWE6ibn29To2MV-Q6CLJiDgtmuWSzOHWVz442dIhiyCfA/viewform?usp=sf_link or stop in at the library to register. For anyone else wanting to learn how to needle felt using their own materials, the instructions are as follows:
Needle felting is one of those crafts that seems hard but really isn’t! There are just a few key tips and tricks to know and then you will be on your way.
First off, this kit includes 2 cloth bags. This is one of the easiest ways to learn how to needle felt because it is not a 3-D project so you can get the feel for it in a two-dimensional way. We are going to “embroider” the bags by needle felting a small design of your choice onto them. In one bag, you have your needles, the needle holder, and a thumb guard. (Be careful when grabbing the bags so you don’t get poked!!) The needles are different sizes and it really doesn’t matter which one or ones you use; it is up to you. When starting out it is not a big deal, but if you pick this up as a regular hobby you may find certain sizes work better for different projects. Then in the other bag there are different colors of wool for you to felt with. With needle felting, a little goes a LONG way so you will not need very much, especially for these small designs. We made sure to include two bags, so you can practice. Lastly, there is a piece of foam which you will cut to fit inside your bag to needle felt on. When you are done with your bags you can fill them with a small gift, herbs to make a sachet, gift them, or keep them!
That being said, let’s begin needle felting!


Pull wood piece out, crook of needle goes in the thicker end to store. Place crook of needle in small end and stick back in handle to use.
A few tips for successful needle felting:
Here is my example, I decided to do poppies:

If you enjoyed this craft and would like to further your needle felting skills; you can felt flat sheets and add designs on top to frame like a picture, ball up wool roving and felt it on the foam directly while working every side to create 3D figures, or needle felt soap and dryer balls. You can find lots of inspiration and tutorials for these suggested ideas on Youtube and Pinterest to keep going!
Golden Sun Solstice Craft
Happy Summer Solstice! This week we are making a golden sun using cardstock and paint chips.
You will need white cardstock, different shades of yellow or gold paper (we used paint chips!), scissors and glue for this craft.
Glue your circle on the page, deciding on how you would like your composition to look. This will be your sun. Then begin cutting out strips and arranging them around your sun to create the rays. We included a variety of colored paint chips to cut up in different ways. Do not worry if they go off the page. Once you like how they look, glue them down. Lastly, trim any edges hanging off the page. The picture below will give you some inspiration:

Since Father’s Day is on Sunday, June 20th, this week’s craft will be centered around honoring the father figure/s in your life with 5 things you love about them.
You will need markers, 5 popsicle sticks, a glue stick, construction paper, and scissors for this craft.
Take your 5 popsicle sticks and decorate them however you wish with your markers. Then line them up horizontally. Take your piece of paper and measure how much you need to trim by laying it over your sticks. You want the decorations of the sticks to show evenly on the sides, and you may leave a little extra along the top and bottom for more writing room, but not more than a popsicle stick width.
Once your paper is trimmed, line it up again and take note of where each stick begins and ends through your paper. Use the top or bottom extra space above the sticks to write “Five Things I love about _____” Write your 5 thing you love about the father figure in your life, lining each up so it is one per stick.
Glue your paper to your sticks once your message is written. Take your ribbon and glue it down the center vertically on the back. Then, fold the extra paper at the top over the top stick and fold the extra paper at the bottom up over the last stick and crease in those spots. Then just fold your message up and tie it.


This craft is available as the second take-n-make kit for teens participating in the Teen Summer Reading Challenge. ( Ages 13-20). Registration is required and that opened on June 9th. Once they are gone, they are gone! Register here: https://docs.google.com/forms/d/e/1FAIpQLSew0_VmOA_4rNMQcx0VuPoSxKZcjZxOuH5F1-XS2jv7mLYsow/viewform?usp=sf_link or stop in at the library to register. For anyone else wanting to make their own bubble tea using their own materials, the instructions are as follows, which include what was in our kits, and how to make it with your own supplies:
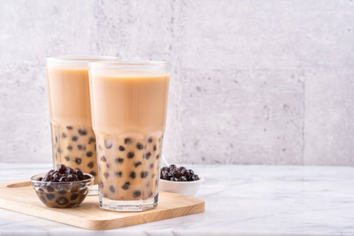
Bubble Tea, also known as pearl milk tea, bubble milk tea, or boba tea, is a drink that was made popular in Taiwan in the 1980s. It has become a fun and popular drink in the US in the past few years. Bubble tea drinks come in a wide variety of flavors, from traditional tea with milk to tea with juice or fruit smoothies. Drinks can be enjoyed hot or iced. The defining feature of bubble tea is the addition of chewy “pearls” made of tapioca starch.
The kit we used was prepackaged with one milk and tea powder packet, 1 straw, and 1 package of tapioca pearls. The kit has enough to make 1 serving of matcha bubble tea. Adding sugar and milk is up to you! If you would like to create more bubble tea uncooked tapioca pearls can be purchased at many local Asian markets or online retailers.
Note: This kit requires the use of a stove or microwave! Please make sure you have permission and/or supervision from your parents/guardian to use those before you make your bubble tea!
Materials needed to complete project
Included in kit ( You will need to purchase these items if you are making it on your own) :
Not included in kit:
Instructions:
Brew your tea
(Note: If you want your finished drink to be cold, make your tea first. If you want your finished drink to be warm, cook your tapioca pearls first and make your tea second.)
Stovetop method:
Microwave Method for if using a prepackaged kit like the one we used:
If you liked this project and enjoyed the drink, you can recreate it by buying bulk tapioca pearls online or at a local Asian Market section of a grocery store. For the tea, any bagged black or green will do! Just steep the bags in boiling water for 2-3 minutes. Then remove and your cooked pearls following the directions below. Or type in “boba kit” online and find premade kits like the ones used in this project.
Special note if you go on to buy your own tapioca pearls to make more:
Cook the tapioca pearls
Stovetop method:
Microwave method:
(Note: microwave tapioca pearls usually turn out a little chewier. If you prefer your pearls on the soft side, use the stove.)
Assemble your drink
Cooked tapioca pearls need special storage, otherwise they get hard and unappetizing. If you have extra cooked tapioca pearls, they can be stored in sugar syrup for 1-2 days. Make sugar syrup by boiling 1/2 cup of water on the stove or in the microwave. Add in 1/2 cup of sugar, and stir until dissolved. Remove from the heat and let cool. Put the pearls and syrup in an airtight container and store in the refrigerator. Uncooked tapioca pearls can be kept in an airtight container for 1-2 months.
You will need a piece of cardboard or cardstock paper, scissors, yarn, aluminum foil, a glue stick, and either paints, markers, or crayons to decorate.
Start by cutting a lizard shape out of your cardboard or cardstock. Then cut little grooves along the sides.
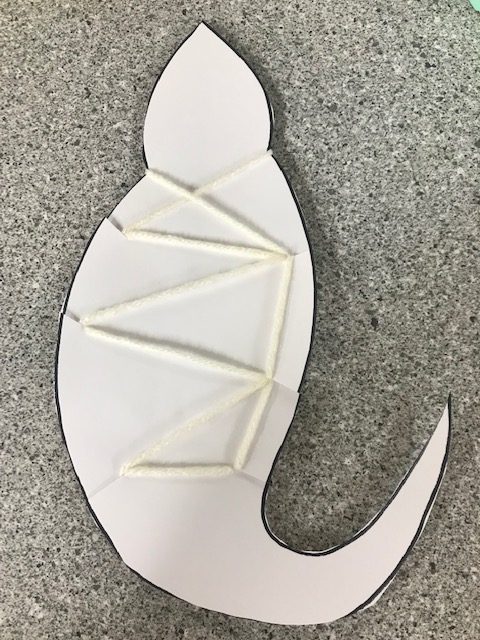
String your yarn through the grooves to make whatever pattern you’d like for the lizard’s back. Just tie it off on the backside.
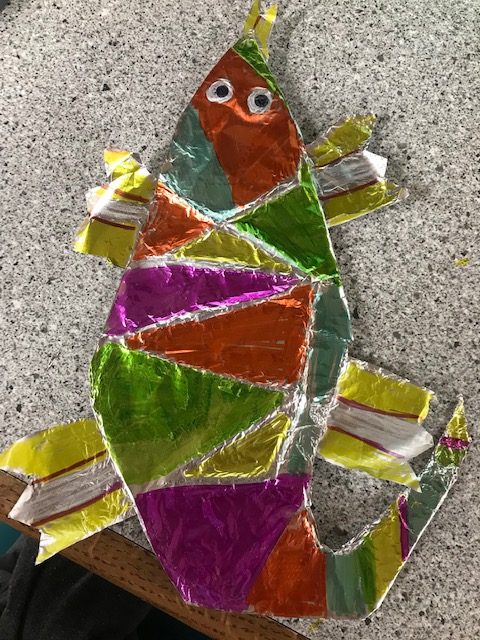
Then cover the lizard evenly with tinfoil. This is the fun part! Color your lizard using paints, markers, or even try crayons. The texture is fun when drawing on tinfoil. If using crayon, just be mindful that you don’t tear through your lizard. Then use leftover tinfoil to make legs and a tongue.
This one was decorated with white crayon and sharpies.
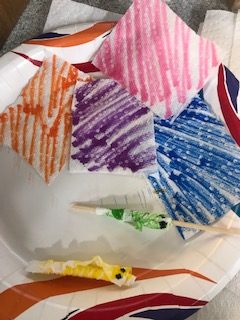
Caterpillar Craft
You will need washable markers, a paper towel, a wooden dowel or pencil, and a plate and water for this craft.
Cut your paper towel into about 6 small squares. Then color each square with your markers. These will be your caterpillars. You will use the stick to roll each piece of paper towel into a worm. Scrunch them up while still on the stick. Draw a face on if you like! Then release them from the stick and place them on a plate.
You will take a tiny amount of water and put it on the worms to watch them grow and move! You only need a few drops.
Enjoy your coloring page!

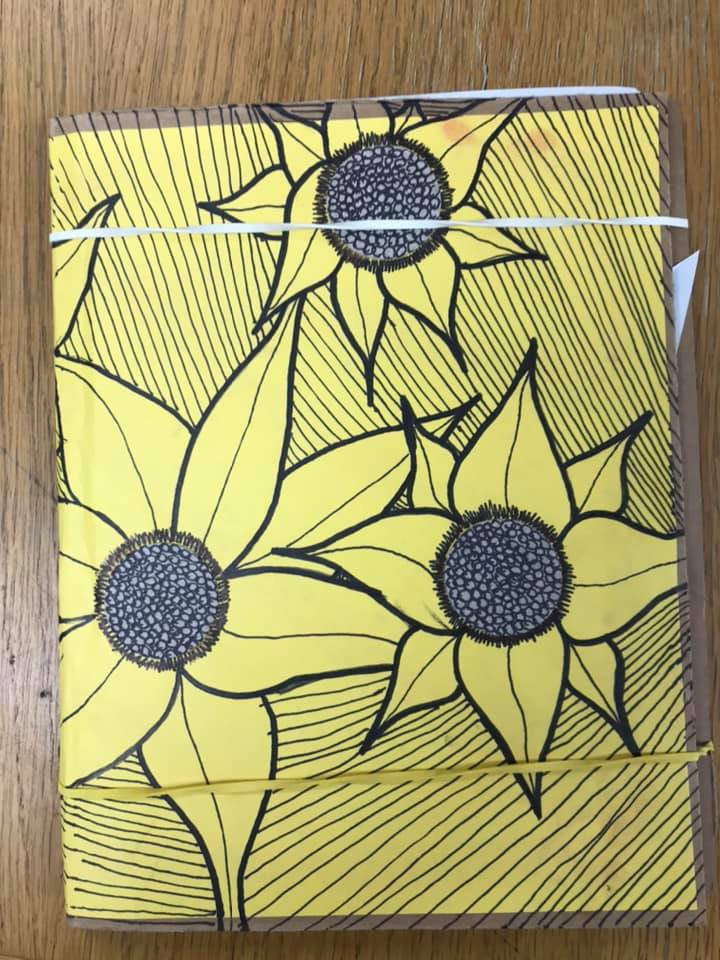
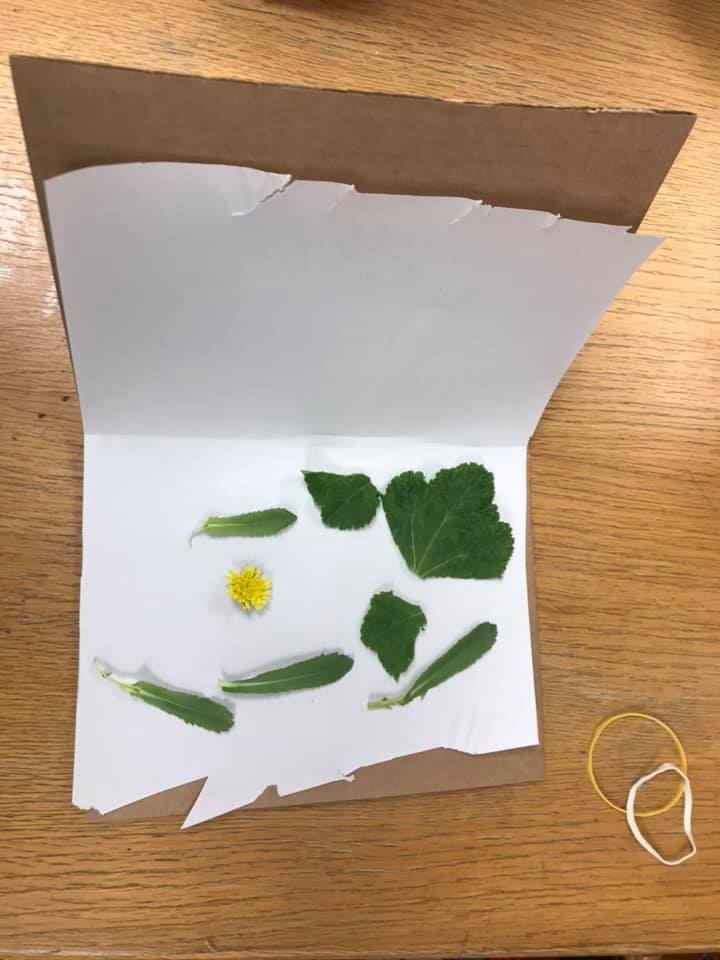
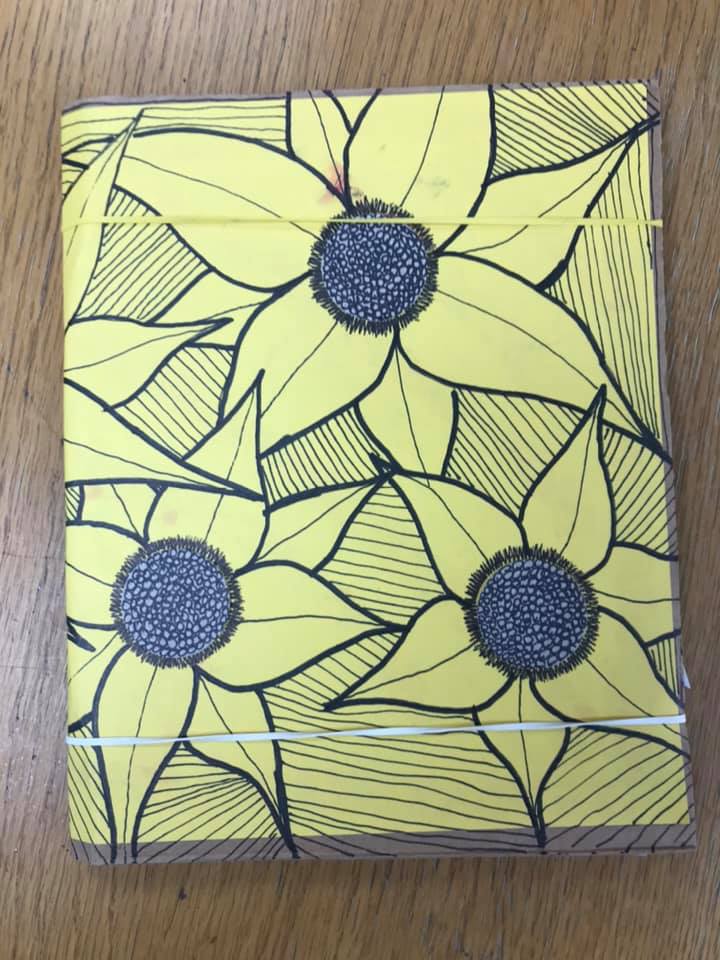
This week we are making cardboard flower presses. There are so many fun activities to do with pressed flowers. This is an easy way to press and keep track of your flowers as you are out gathering them.
All you will need is a piece of cardboard ( whatever size you want for your press to be), two rubber bands, scrap paper like newspaper, copy paper, or even tissue paper, and whatever you would like to use to decorate your press.
To make and use:
Cut your paper sheets to roughly fit the size of your cardboard press. You will fold the cardboard piece in half, so the paper inside will also end up folded with it. It will resemble a book. Decorate the outside however you wish. When you press flowers, try to go for ones that have the same thickness and then just lay them on one paper sheet and close the press. You will rubber band the top and the bottom of the press to keep the paper and flowers inside. Then when you are home, just lay several books on top and let them dry for a week. Check on them and if more time is needed, wait another week.
Here is an example one: